
Copy the numeric app ID
Integrations
Wordpress
There are two ways to add Chatify to a Wordpress site.
Option 1: Adding Live Chat to your Wordpress template using our Wordpress Plugin. Installation instructions can be found on our Wordpress Plugin page
Install the Plugin on your site from the Plugin Section on WordPress, accessed from your Admin section. To do this, in your Wordpress admin panel, navigate to: Plugins > Add New > Search plugins > Pubble live chat > Install..
Once installed, you will see a message:
"You need to configure Chatify Live Chat to add live chat on your website. Please configure your Chatify Live Chat."
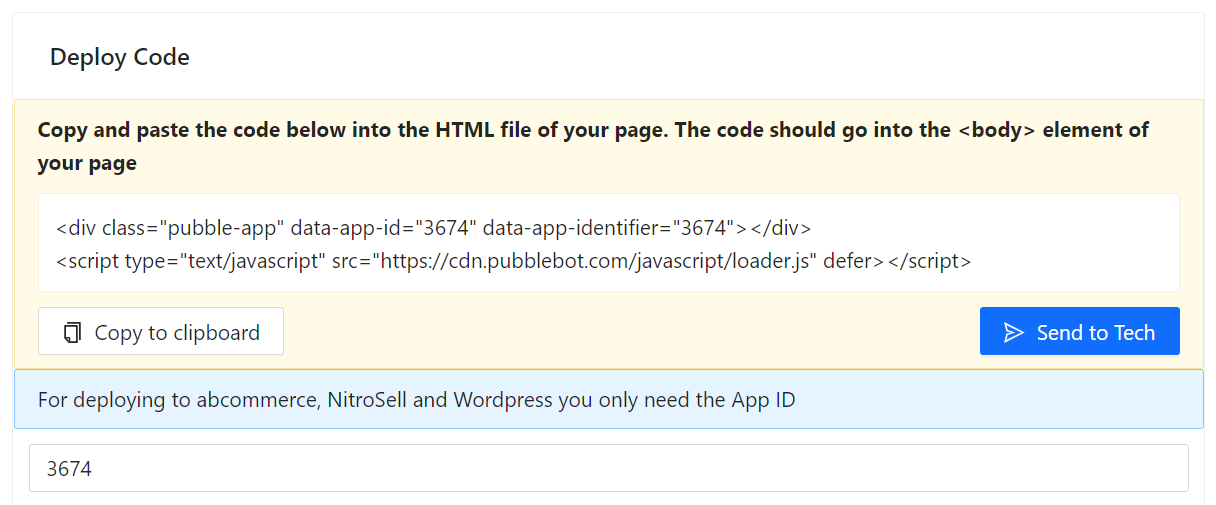
To configure the plugin you will need the APP ID of the Live Chat widget. You can obtain this from the Chatify admin center. Go to Apps > Live Chat In the Deploy Code section, copy the app ID (number): data-app-id="1234"
With the APP ID, you can configure Chatify Live Chat on your website. To do this, in the Wordpress Admin section, you should have a message on top "You need to configure Chatify Messenger to add live chat on your website. Please configure your Chatify Live Chat." Click the link and enter the App ID in the input box.
Option 2: Adding Live Chat to a Single Page. Go to the Web Editor in Wordpress and shift to 'text mode' and paste the code snippet. This would be the option you would choose if you were running a Live Q&A or Live Blog. We do NOT advise using this approach for site wide deployment of Chatify.
Javascript
To deploy the Live Chat widget on your website you will need to have access to your CMS or HTML files. The Live Chat widget is added by copying a Javascript code snippet into the body element of your HTML.
To get the code snippet, from the admin center go to Apps > Live Chat where you can see the deploy code.
The code will look similar to that below, just copy the Javascript segment into your HTML inside the <body> element, save and then you are good to go

Copy the code and add your HTML file
If you do not have access to your CMS or HTML files, you can email the code snippet and instructions to your web master to help you to install. Simply click the "Send to Tech" button and enter the email address of your web master
With the Chatify Facebook integration you will be able connect your business Facebook Pages with Chatify. Any conversations started on your Facebook Page will be synced in Chatify and you can reply to Facebook conversations from the Chatify dashboard.
Connecting with Facebook is a simple few-clicks process which can be started in the admin center: Community > Integrations > Facebook
Note: we will not post messages on your public Facebook Pages.
With the Chatify Instagram integration you will be able connect your Professional Instagram accounts with Chatify. Any private conversations sent to your Professional Instagram account will be synced in Chatify and you can reply to Instagram conversations from the Chatify dashboard.
Connecting with Instagram will require you to have a professional Instagram account which is connected to a Business Facebook Page
To connect a Professional Instagram acount to your Facebook Page, first go to the Facebook Business Portal and select All Tools > Page Settings from the left-hand menu.

Select the Page Settings for the selected page on the Facebook Business Portal
This will take you to the Page settings where you should click Linked Accounts from the left-hand menu
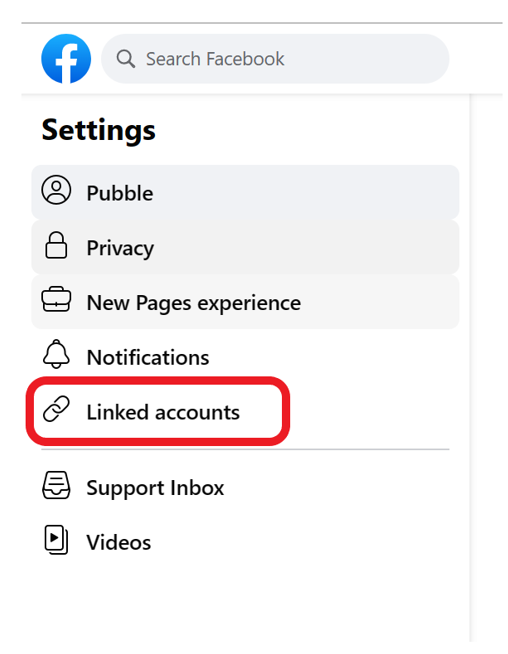
Select Linked Accounts from the Page settings menu
From there select Instagram from the left-hand menu, and click the Continue button so start the process of linking the Instagram account to the Facebook Page
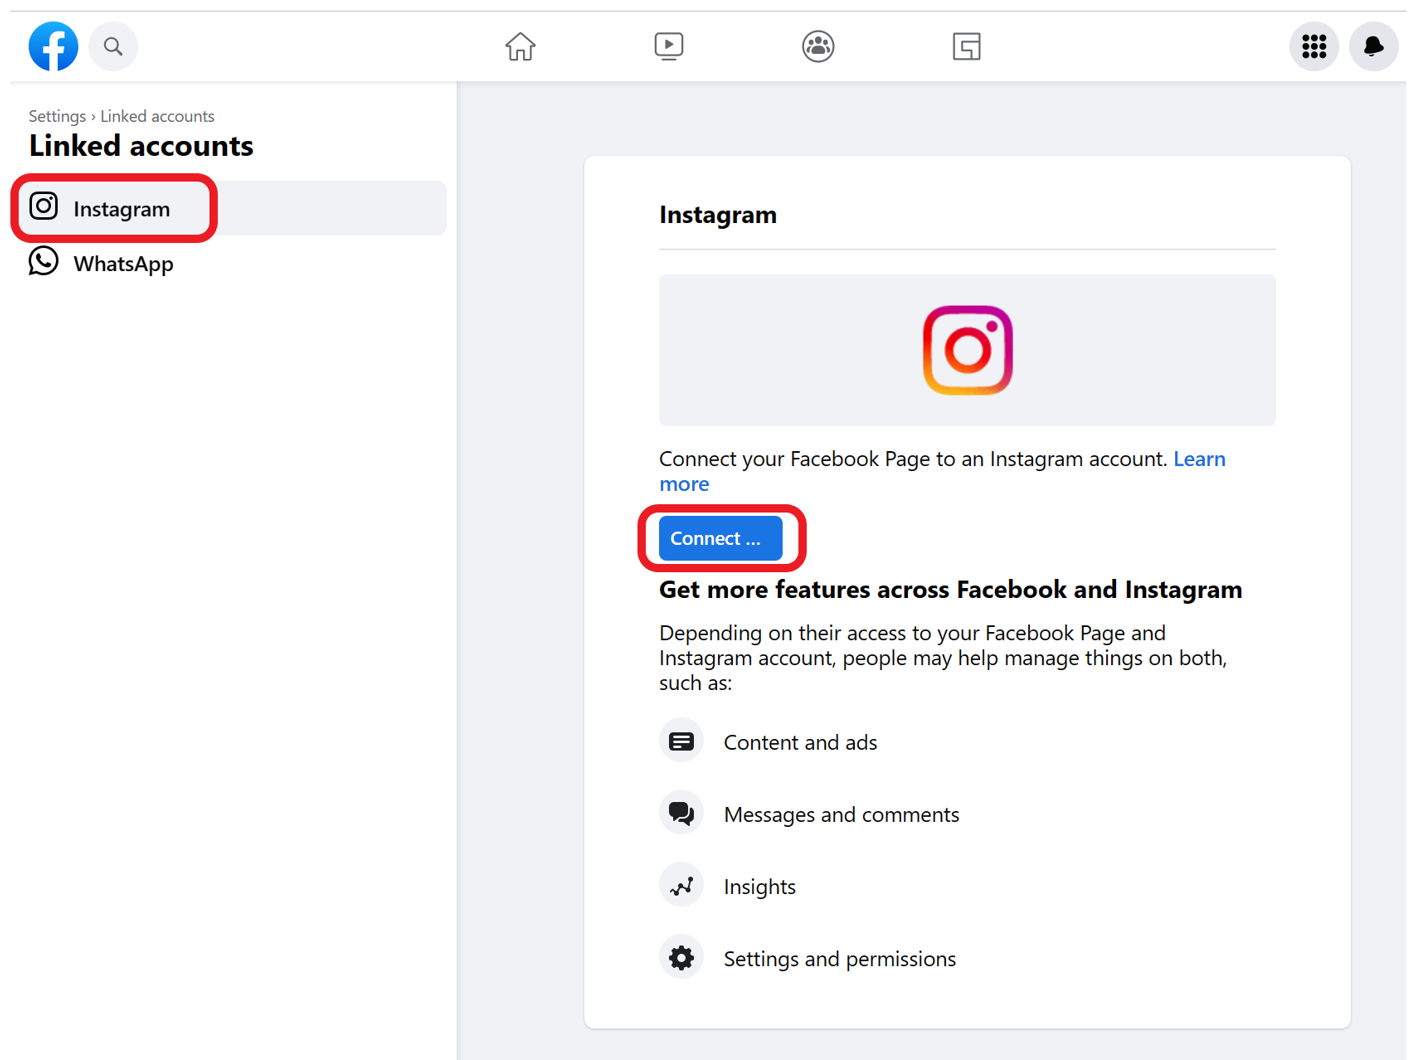
Link Instagram to your Facebook Page
Once you have a linked Instagram account on your Facebook Page, you can then add the integration on Chatify go to admin center: Community > Integrations > Instagram
You will be directed to Facebook where you will be asked which Instagram Business Accounts you want to use with Pubble

Select the Instagram accounts to integrate with Chatify
If you have multiple Facebook Pages with connected Instagram acounts, you will be asked to select the Instagram acounts you want to integrate with Chatify
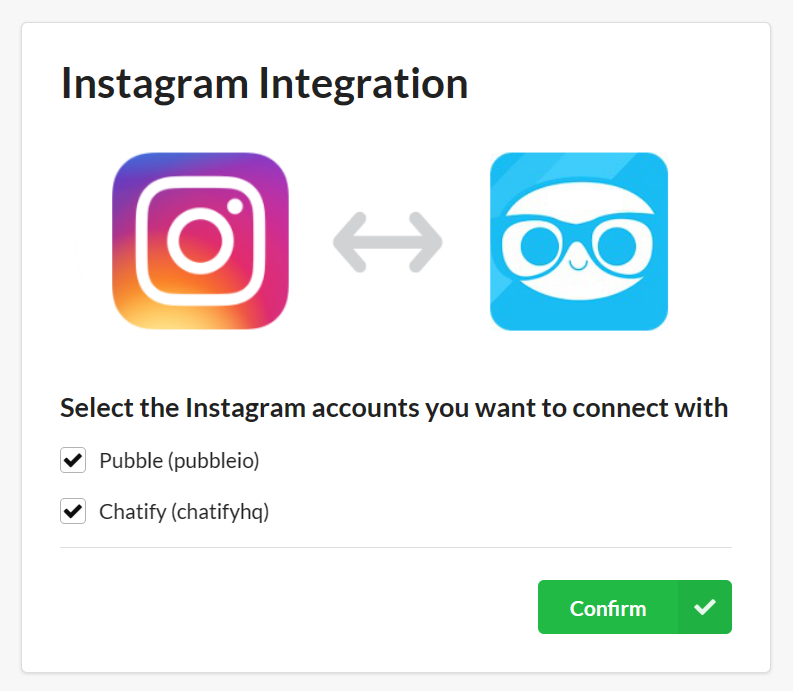
Select the Instagram accounts to integrate with Chatify
Click Confirm to add the integration.
Note: we will not post messages on your public Instagram acounts.
Slack
Our integration for Slack will send notifications of any new questions asked on the Chatify Live Chat widget to a specified channel on Slack, this way Slack users can always keep on top of any new questions asked on your website.
Connecting with Slack is a simple few-clicks process which can be started in the admin center: Community > Integrations > Slack
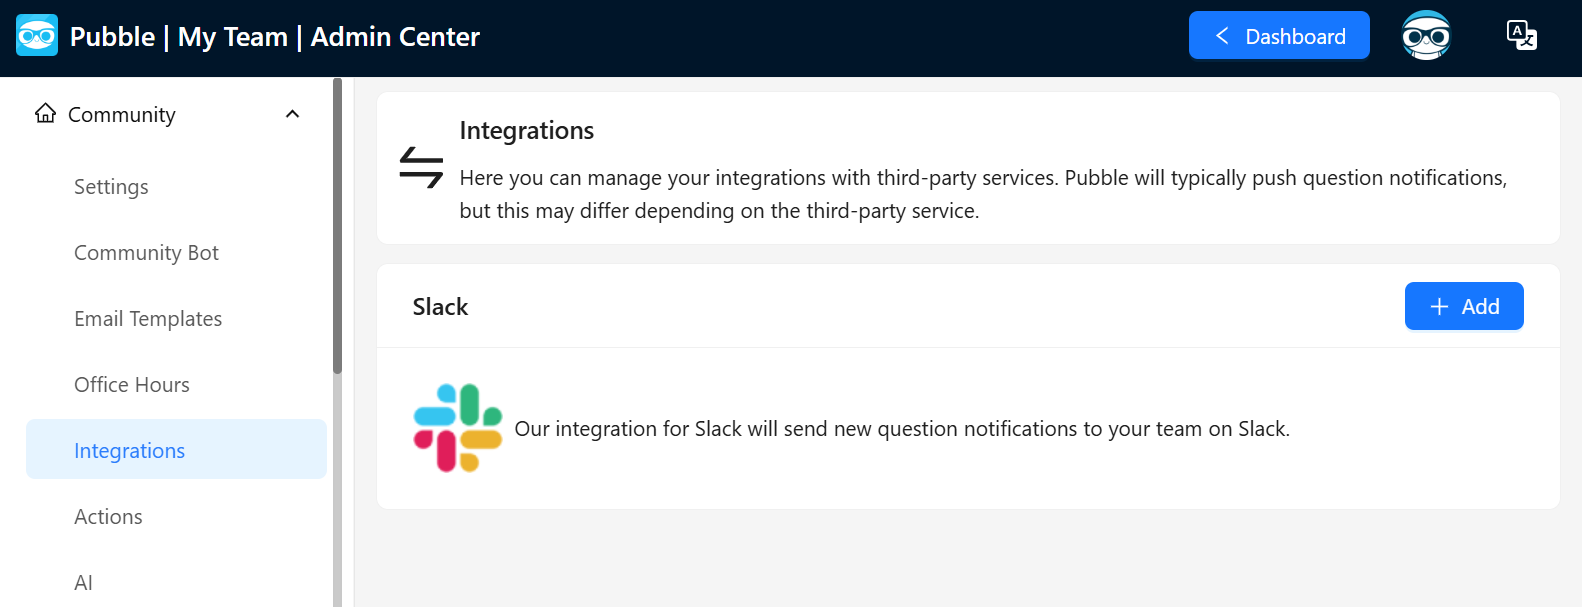
Navigate to the integrations section and click Add.
The Click on "Add+" button for the Slack integration.
will open the integration page for your Slack team.
If you have multiple Slack teams, make sure that you select the correct one.
Choose the channel that you want the questions from Pubble to get pushed into.
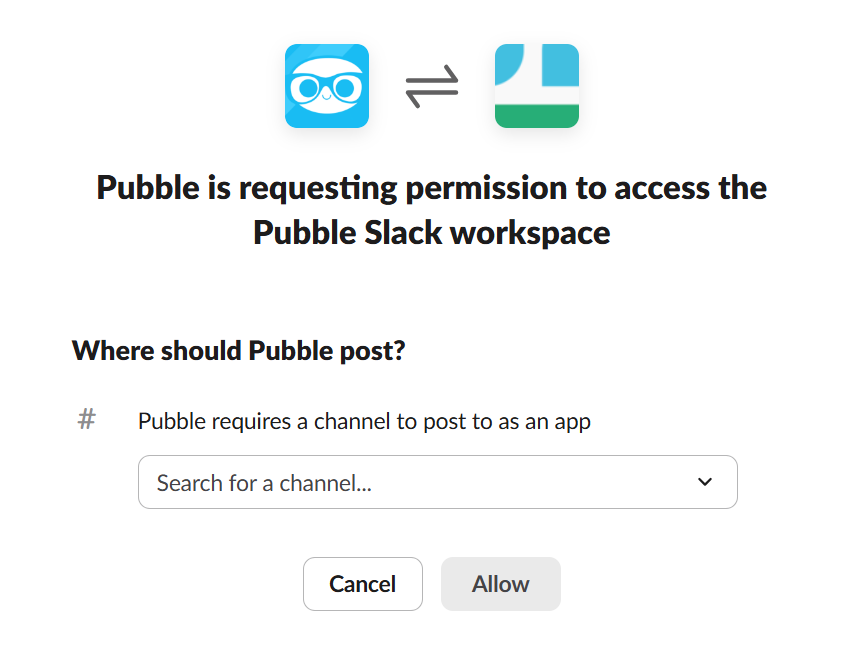
Confirm which channel on Slack to push notifications to
Click Authorise.
You will be returned to Chatify with a final screen confirms that the integration with Slack has been successful.
To test that all is working correctly, ask a question using the Live Chat widget on your website. The question will get pushed into the Slack channel that you configured:
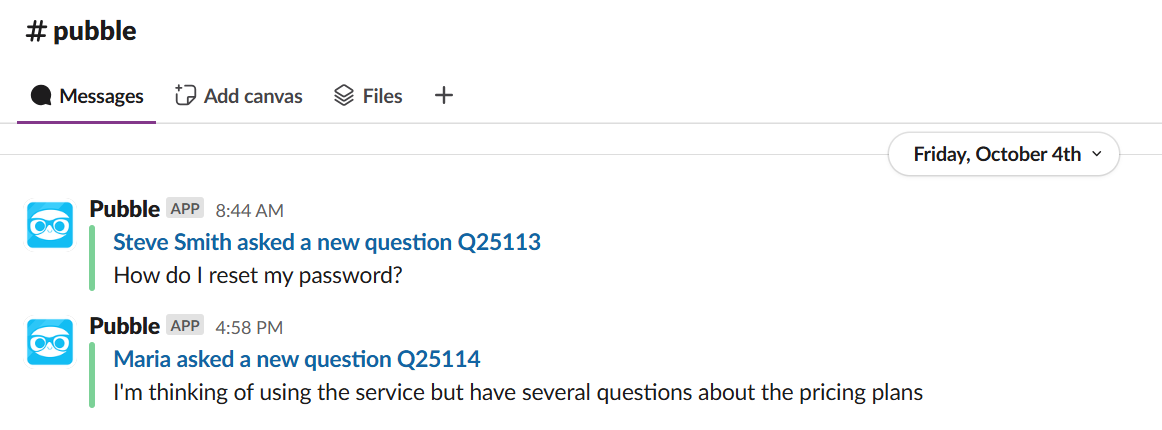
Notifications sent to your selected Slack Channel
To learn more about how Chatify manages and stores third-party data please review our Subscriber Agreement, Privacy Statement and GDPR overview
Teamwork Desk
Our Teamwork Desk integration will enable you to push questions asked on Live Chat, Community QA and Live QA as Tickets on your Teamwork Desk product.
To add a Teamwork Desk integration go the admin center Community > Integrations > Teamwork
You will need your Desk API key and your Teamwork Desk subdomain. The subdomain is the unique name of your team which you use in your Teamwork Desk URL: https://[subdomain].teamwork.com/desk
Note: you will need to use the Desk API of an administrator account on Teamwork Desk.
You can obtain your Desk API key from your profile on Teamwork Desk, accessible via the top-right option and clicking View Profile > API Keys
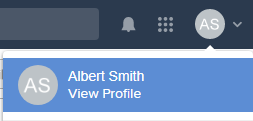
Access your API key via this menu
Or via the following URL (replacing the subdomain with your own)
https://[subdomain].teamwork.com/desk/#myprofile/apikeys
Once you have entered your API key and subdomain there are several options setting up the integration:
Add Teamwork Desk agents to Chatify: add existing agents to your Chatify community. Any agents already in Chatify will not be listed.
Auto-add agents to Chatify: any new agents subsequently added to Teamwork Desk will be added to Chatify
Auto-add customers to Chatify: any new customers subsequently added to Teamwork Desk will be added to the contacts table in Chatify
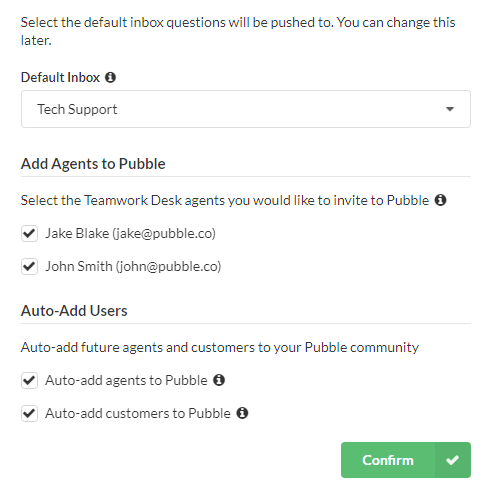
Options when adding Teamwork Desk
Once you have successfully integrated with Teamwork Desk you will see the option to push a Chatify question into Teamwork Desk in the dashboard
Note: you can only push questions where the question author has supplied an email address
Before confirming to push to Teamwork Desk, you will need to select which Teamwork Desk agent the question will be assigned to and also which inbox it will be added to:
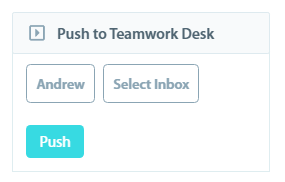
Teamwork Desk options
Once the question is pushed to Teamwork Desk, a transcript of the conversation will be added as a Ticket. Any subsequent replies will also be sent to the ticket. Additionally, any replies made from Teamwork Desk will also be pushed back into the conversation on Chatify keeping the conversation/ticket synchronized between the two systems.
Teamwork Desk Ticket, pushed from Chatify
Replies to a question on the Chatify dashboard will only be added to Teamwork Desk if that Chatify team member is also an agent on Teamwork Desk with the same email address. Therefore it is advised that your Chatify team members should also be members on Teamwork Desk.
To make this easier you should select to auto-add agents as detailed above. After connecting with Teamwork Desk any new agents you add on Teamwork Desk will also be added as a team member on Chatify. The user will receive an email from Chatify inviting them to activate their account on Chatify.
Help Scout
Our Help Scout integration will enable you to push questions asked on Live Chat, Community QA and Live QA as Tickets on your Help Scout product.
To add a Help Scout integration you must first create a custom app on your Help Scout profile. To do so follow the steps below:
On your Help Scout dashboard click the profile icon in the top-right and select "Your Profile" from the menu
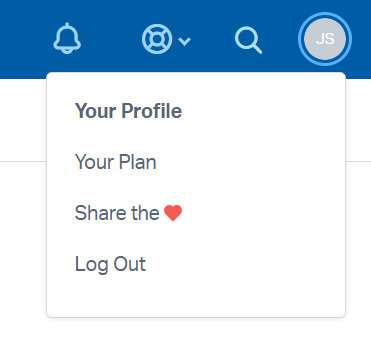
Go to Your Profile
From the right hand menu select "My Apps" and click the "Create My App" button
Give your app a name such as "Pubble App"
Then enter the Redirection URL. This must follow the pattern: https://[myteam].chatify.com/integration/helpscout/auth
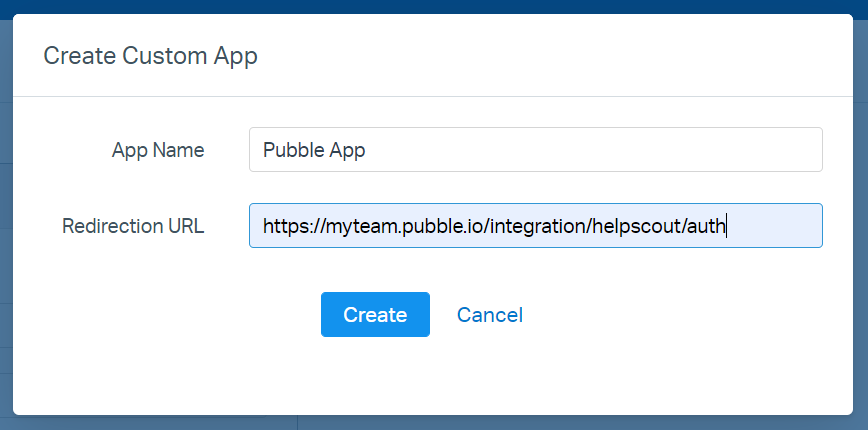
Creating your custom app
Once your app is created an App ID and App Secret will be generated. You will need these shortly.
With the custom app on Help Scout created, revisit the admin center on Chatify and go to Community > Integrations
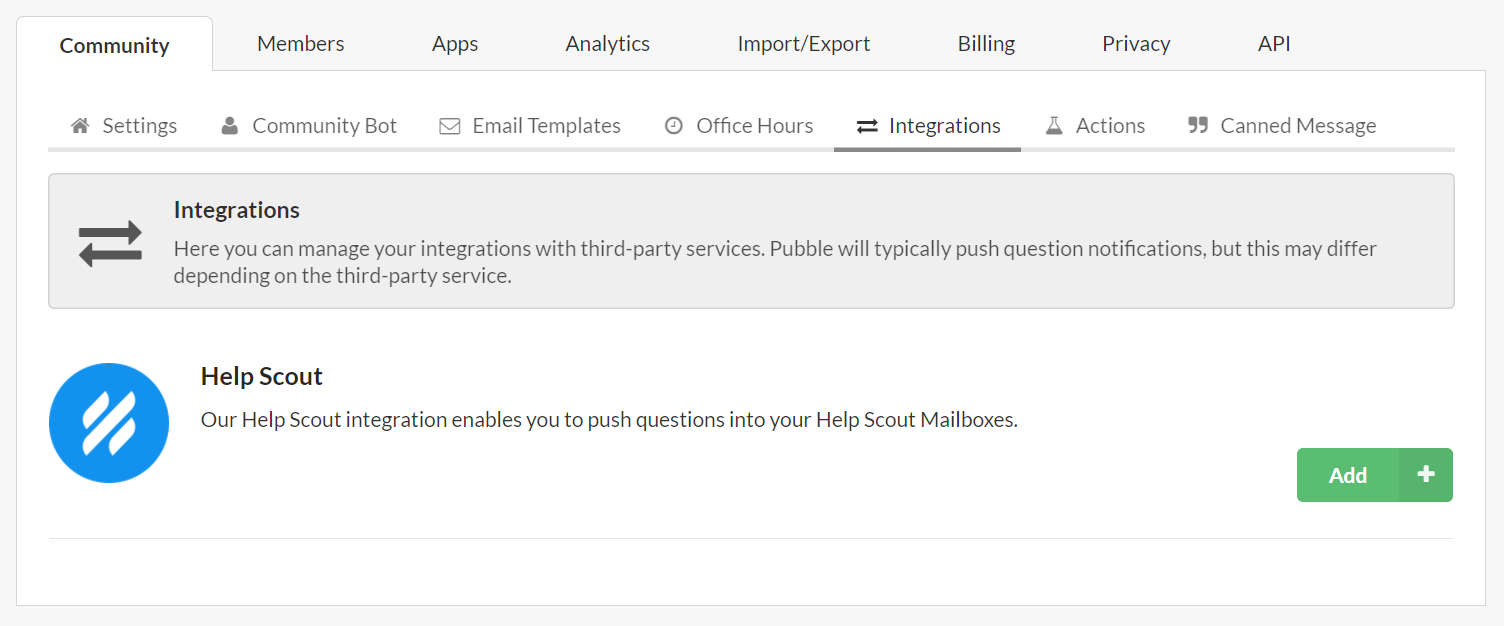
Adding a Help Scout integration
From here click the "Add" button. You will then be asked to input the App ID and App Secret from your custom Help Scout app. Once that is done click "Next" and the integration will be added
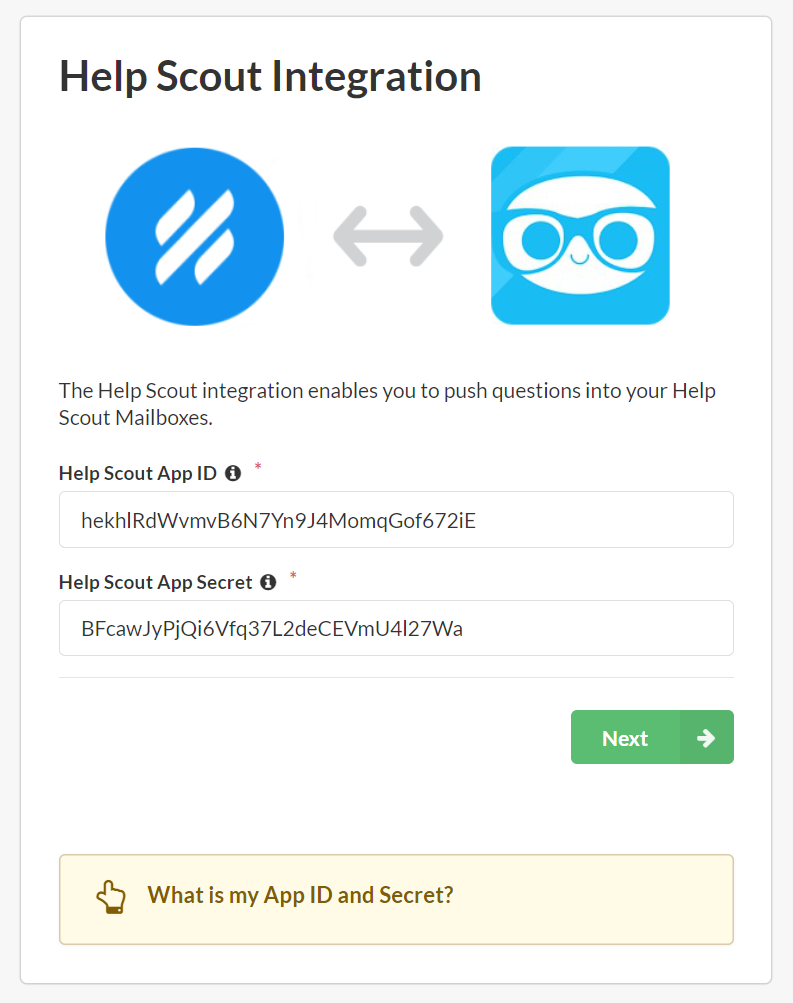
Entering the app details
With the integration now added you will be able to push any question where the user has provided an email address to your Help Scout mailboxes.
To do this open a conversation and on the right-hand panel you will see an option to push the conversation to Help Scout
Here you will also be able to select a mailbox to push to the conversation to
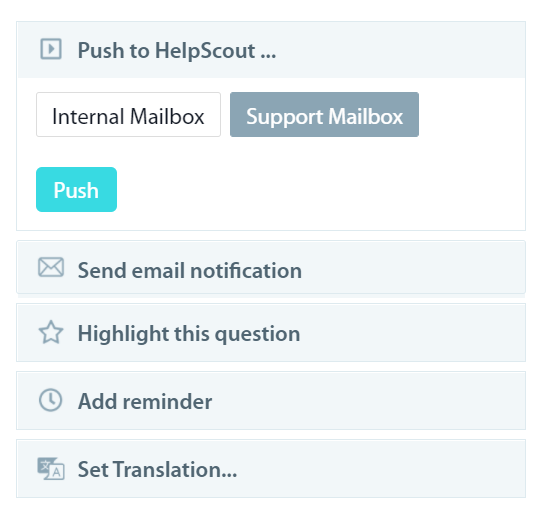
Sending a conversation to Help Scout
Pushing a conversation to Help Scout will send a transcript of the conversation up until that point as the first post in Help Scout. From this point on the conversations will be synchronized with any subsequent replies from Help Scout will be pushed back into the conversation on Chatify and any replies on Chatify will be appended to the conversation on Help Scout
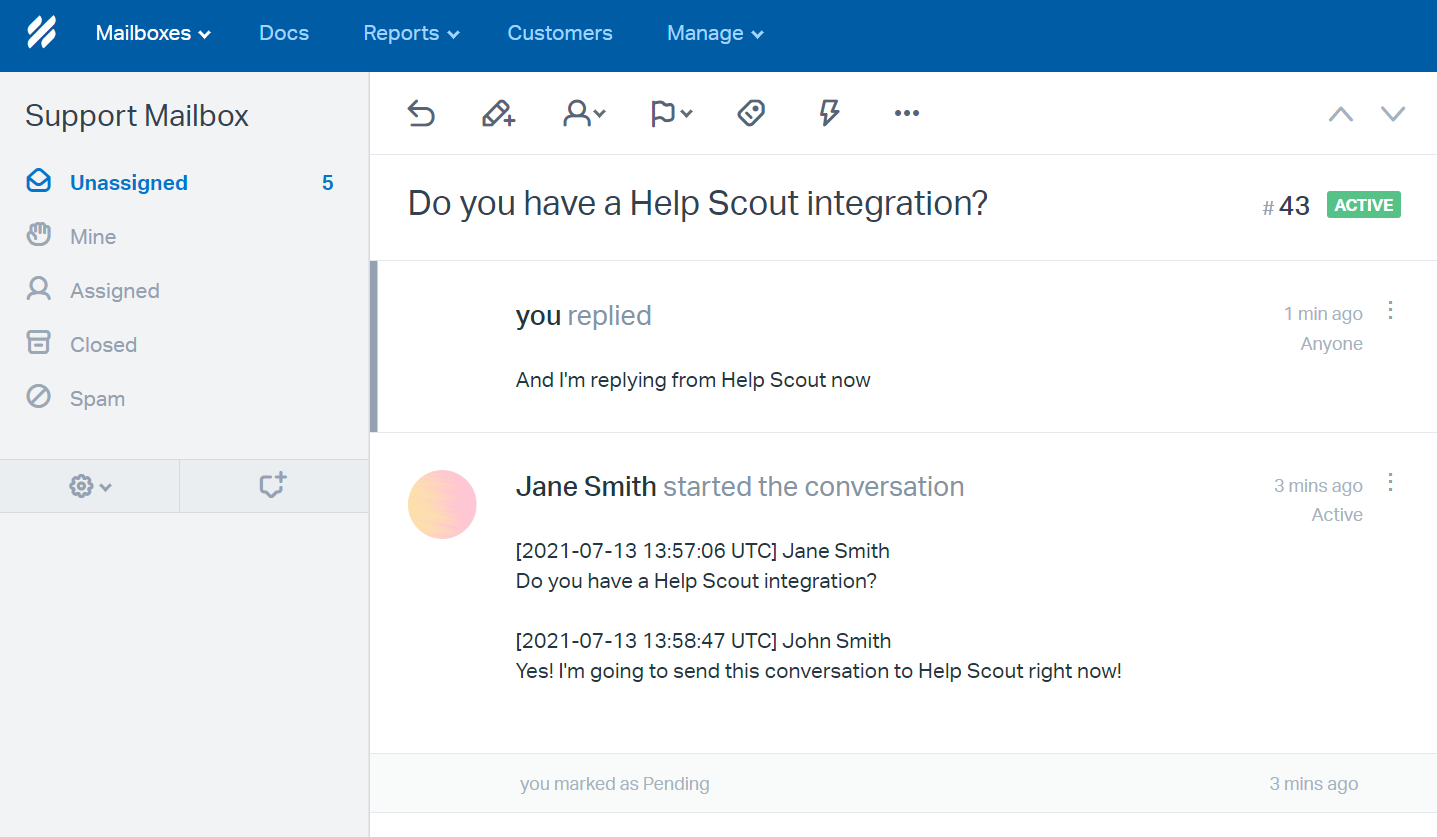
The conversation in Help Scout
Nitrosell
Here's how you activate Chatify on your Nitrosell webstore.
Once logged into your Nitrosell dashboard, go to the configuration options for your webstore:

Go to configuration options
From the following screen, go to Settings > All Config Options
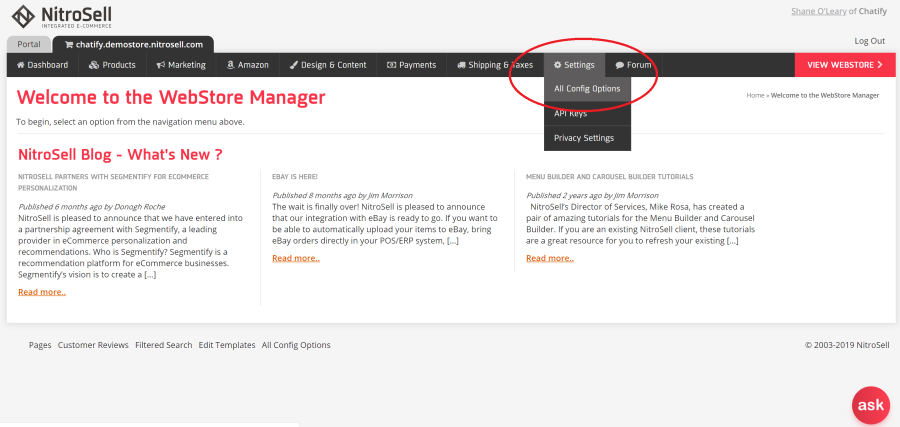
Select "All Config Options"
Search for "Chatify" and click the "Enable Chatify Integration"
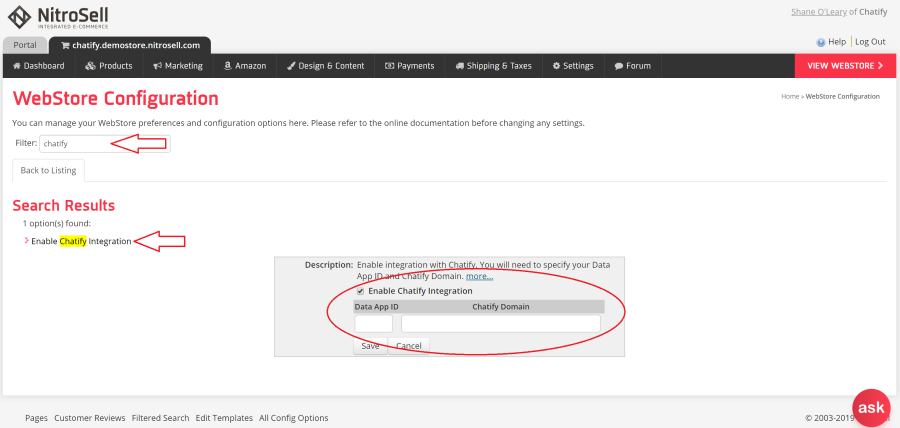
Enable the Chatify integration
To configure the plugin you will need the APP ID of the Live Chat widget. You can obtain this from the Chatify admin center. Go to Apps > Live Chat In the Deploy Code section, copy the app ID (number): data-app-id="1234"
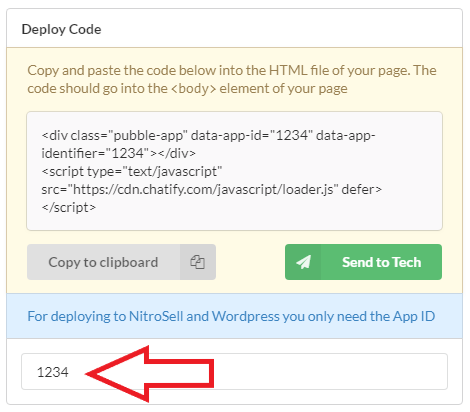
Copy the App ID
Your Chatify domain can be taken from the URL in your browser address bar when you are in the Chatify admin center (before the /admin part). In this case, the example domain is https://team1.chatify.com
ActiveCampaign
With the ActiveCampaign integration you can have contact records automatically pushed to your ActiveCampaign Contacts. Only records that have an email address will be pushed to ActiveCampaign.
To add a ActiveCampaign integration go the admin center Community > Integrations > ActiveCampaign
You will need your ActiveCampaign API key and your ActiveCampaign subdomain. The subdomain is the unique name of your team which you use in your ActiveCampaign URL: https://[subdomain].activehosted.com/overview/
You can obtain your API key from the ActiveCampaign dashboard by going to Settings > Developer or the following URL https://[subdomain].activehosted.com/app/settings/developer

API key in the ActiveCampaign dashboard
The API key is linked directly to your ActiveCampaign user account, therefore you may want to create an account specifically to use with Chatify
When the integration is added a new Tag will be created in ActiveCampaign called Chatify any new Contacts added via Chatify will have this tag attached to it
A note will be added each time the user asks a new question via Chatify with a reference number to the question and a direct link to the conversation back to the Chatify dashboard.
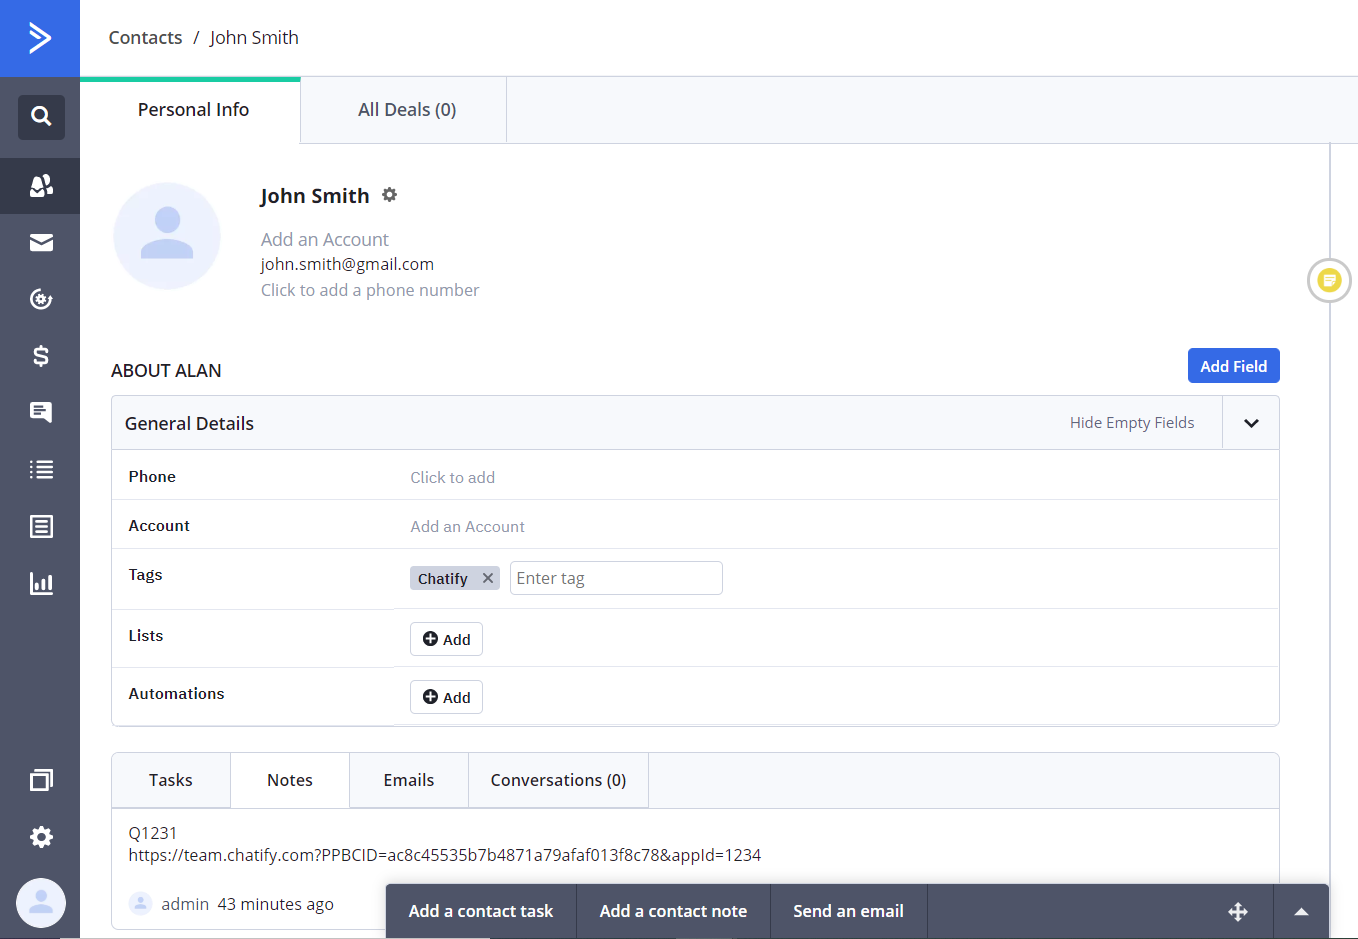
Example Note added to ActiveCampaign Contact